


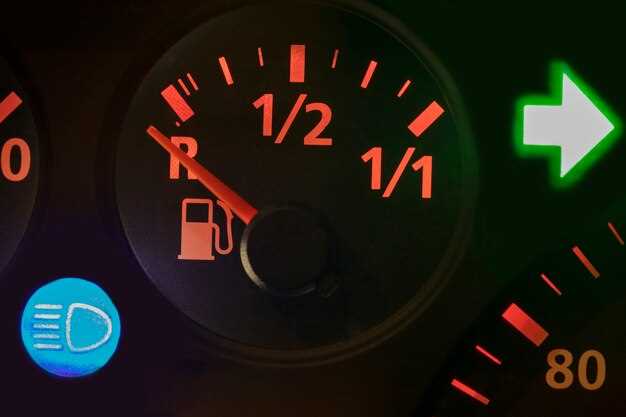
Understanding the nuances of engine light codes is crucial for every vehicle owner. When the check engine light illuminates on your dashboard, it serves as a warning sign that your vehicle’s onboard diagnostic system has identified an issue that requires attention. As a car owner, knowing how to effectively diagnose these engine light codes can save you time, money, and prevent further damage to your vehicle.
This guide aims to simplify the process of diagnosing engine light codes, empowering you with the knowledge needed to tackle common vehicle problems. With the right tools and understanding, you can interpret error codes and make informed decisions about repairs or maintenance. Whether you are a seasoned mechanic or a first-time car owner, these insights will enhance your ability to manage vehicle health proactively.
We will explore various diagnostic tools, explain how to read engine light codes, and provide practical tips for troubleshooting common issues. By following this guide, you will be equipped to address engine problems efficiently, ensuring your vehicle remains in optimal condition. Let’s embark on this journey to demystify engine light codes and strengthen your automotive knowledge.
Understanding Common Engine Light Codes and Their Meanings
Engine lights can signal a variety of issues in your vehicle, often represented by codes that can be read using an On-Board Diagnostics (OBD-II) scanner. Understanding these codes is essential for diagnosing problems accurately and efficiently. Below are some of the most common engine light codes and their meanings:
P0300 – Random/Multiple Cylinder Misfire Detected
This code indicates that the engine control module (ECM) has detected irregularities in the combustion process across multiple cylinders. Causes may include faulty spark plugs, ignition coils, or fuel delivery issues.
P0420 – Catalytic Converter System Efficiency Below Threshold (Bank 1)
This code suggests that the catalytic converter is not functioning efficiently, which can be due to a faulty converter, oxygen sensors, or exhaust leaks. A failing catalytic converter may lead to increased emissions.
P0128 – Coolant Temperature Below Thermostat Regulating Temperature
This indicates that the engine coolant is not reaching the optimal operating temperature. Potential causes include a malfunctioning thermostat, a faulty coolant temperature sensor, or low coolant levels.
P0171 – System Too Lean (Bank 1)
This code appears when the air-fuel mixture is too lean, meaning there is too much air and not enough fuel in the combustion chamber. Common causes include vacuum leaks, clogged fuel injectors, or a failing fuel pump.
P0455 – Evaporative Emission Control System Leak Detected (Large Leak)
This code indicates a significant leak in the evaporative emission control system, which is designed to prevent fuel vapors from escaping into the atmosphere. Possible causes include a loose or damaged gas cap, cracked hoses, or a faulty evaporative canister.
P0440 – Evaporative Emission Control System Malfunction
This code signifies a general malfunction within the evaporative emission control system. It may require further diagnostics to identify the specific component at fault, such as sensors or valves within the system.
P0301 to P0306 – Cylinder Misfire Detected
These codes specify a misfire in a particular cylinder (e.g., P0301 for cylinder 1). Misfires can result from worn spark plugs, faulty ignition coils, or issues in the fuel system.
Recognizing and understanding these codes can help you take timely action to address engine problems. Ignoring them may lead to more serious issues and costly repairs down the line. Consult a professional mechanic if you’re unsure how to proceed after getting a code readout.
Step-by-Step Process for Using an OBD-II Scanner

Using an OBD-II scanner is a straightforward process that can help you diagnose engine light codes efficiently. Follow these steps to ensure a successful diagnostic experience.
First, locate the OBD-II port in your vehicle. This port is typically found beneath the dashboard, near the steering column. It may be necessary to remove a cover to access the port.
Once you have located the OBD-II port, turn off your vehicle’s ignition. Connect the OBD-II scanner to the port by plugging it in securely. Make sure the connection is tight and that the scanner is properly seated in the port.
Next, turn on the vehicle’s ignition without starting the engine. This will power up the scanner. Some scanners may require you to press a power button to activate them.
After the scanner is on, navigate through the menu using the scanner’s interface. Select the option for “Read Codes” or “Diagnostic Trouble Codes (DTC).” The scanner will communicate with your vehicle’s onboard computer and retrieve any trouble codes stored.
Review the codes displayed on the scanner. Each code consists of a letter followed by a series of numbers. Refer to the scanner’s manual or an online resource to interpret these codes accurately. Understanding the meaning of each code will help you identify potential issues with your vehicle.
If necessary, use the “Freeze Frame” option to view additional data related to the trouble codes. This information can provide insight into the engine’s performance at the time the code was triggered.
After diagnosing the trouble codes, you can choose to clear them if you’ve resolved the underlying issue. Select the “Clear Codes” option on your scanner. Confirm your choice to erase the codes from the system. Remember that clearing codes does not fix problems, and you should ensure any necessary repairs are made before clearing.
Finally, disconnect the OBD-II scanner from the port and ensure any covers are replaced. It is advisable to take your vehicle for a short drive to test if the check engine light reappears. If the light returns, further investigation or professional assistance may be needed.
Tips for Interpreting Diagnostic Trouble Codes Accurately
When dealing with Diagnostic Trouble Codes (DTCs), accurate interpretation is crucial for effective vehicle repair. Here are some tips to guide you through the process.
1. Understand the Code Format: Most DTCs follow the OBD-II format, which includes a letter followed by four digits. The letter indicates the system (P for powertrain, B for body, C for chassis, and U for network). Knowing the format helps narrow down potential issues.
2. Use Proper Reference Material: Always refer to a reliable repair manual or an online database specific to your vehicle make and model. This ensures you are interpreting codes in the correct context, as the same code can signify different problems in different vehicles.
3. Look for Related Codes: Sometimes, multiple codes can illuminate the same issue. When diagnosing, consider all related codes and their possible connections. This will help in understanding if the problems are interlinked or separate.
4. Consider the Symptoms: Pay attention to the symptoms experienced by the vehicle. These can provide valuable clues in understanding the context of the DTC and assist in confirming a diagnosis.
5. Clear and Retest: After repairing or inspecting components, clear the codes and retest. This can validate your diagnosis. If the code reappears, further investigation may be necessary.
6. Use a High-Quality Scanner: Invest in a reliable OBD-II scanner that can provide real-time data, freeze-frame information, and manufacturer-specific codes. This advanced insight enables better problem-solving.
7. Avoid Jumping to Conclusions: Resist the urge to replace parts based solely on a trouble code. Issues may arise from other systems or even be due to faulty sensors. A thorough inspection should always precede any replacement.
8. Consult with Experienced Technicians: If uncertain, seek advice from experienced mechanics or automotive technicians. Their expertise can help clarify complex codes or symptoms that may not be immediately obvious.
By following these tips, you can enhance your ability to interpret Diagnostic Trouble Codes accurately, leading to more effective vehicle diagnostics and repairs.