Blog

  • How to Improve Throttle Response on Your Truck

    How to Improve Throttle Response on Your Truck

    How to Improve Throttle Response on Your Truck

    In the world of heavy-duty trucks, performance is paramount. The ability to accelerate efficiently and respond promptly to driver inputs can significantly impact both the driving experience and overall productivity. One key aspect that often gets overlooked is throttle response. Enhancing throttle response not only improves driver control but also optimizes engine performance, leading to increased efficiency and better handling under various conditions.

    The throttle response of your truck refers to how quickly and effectively the engine responds to the accelerator pedal. A sluggish response can frustrate drivers and hinder performance during critical moments, such as merging onto highways or towing heavy loads. By focusing on improving this aspect, truck owners can unlock new levels of capability and responsiveness in their vehicles.

    Several modifications and techniques can be employed to enhance throttle response. Everything from tuning the engine management system to upgrading the throttle body and air intake system can make a significant difference. Understanding these options allows truck owners to make informed choices that align with their performance goals. In this article, we will explore various methods and best practices for upgrading your truck’s throttle response, ensuring you get the most out of your driving experience.

    Upgrade Your Throttle Body for Increased Airflow

    Upgrade Your Throttle Body for Increased Airflow

    Upgrading your throttle body can significantly enhance your truck’s throttle response and overall performance. The throttle body is responsible for regulating the amount of air entering the engine, and improving its design allows for better airflow, which is essential for optimizing combustion efficiency.

    Increased Diameter: One of the main advantages of upgrading the throttle body is the potential for a larger diameter. A bigger throttle body allows more air to enter the engine, which can lead to improved horsepower and torque. This is particularly beneficial for trucks used in towing or off-road conditions, where additional power is often needed.

    Improved Design: Many aftermarket throttle bodies feature enhanced designs that minimize turbulence and obstruction, resulting in smoother airflow. This reduction in turbulence not only improves performance but also can lead to better fuel efficiency. Look for throttle bodies that are engineered for increased velocity, as this contributes to quicker engine response upon acceleration.

    Easy Installation: Installing a new throttle body is often straightforward, requiring minimal tools. Most models come with installation kits that simplify the process. Ensure you have the correct specifications for your truck model to guarantee compatibility and optimal performance gains.

    ECU Tuning: After upgrading your throttle body, consider ECU tuning to fully exploit the benefits of increased airflow. A tuned engine control unit can adjust fuel maps and ignition timing, enabling your truck to make the most of the additional air. This combination maximizes throttle response and overall performance.

    Overall, upgrading your throttle body is a strategic move if you’re looking to enhance your truck’s performance. With improved airflow, you can expect a noticeable difference in throttle responsiveness and engine power, making your driving experience more enjoyable and effective.

    Fine-Tune Your Engine Control Unit (ECU) Settings

    Fine-Tune Your Engine Control Unit (ECU) Settings

    Tuning your Engine Control Unit (ECU) is a crucial step in enhancing throttle response and overall vehicle performance. The ECU controls various engine functions, and by modifying its parameters, you can achieve better throttle response and improved acceleration. Here are key steps to fine-tune your ECU settings.

    First, consider investing in a quality tuning software or a professional tuning service. Advanced software allows you to adjust fuel maps, ignition timing, and air-fuel ratios. These adjustments can optimize engine performance and responsiveness. Make sure to choose software compatible with your truck’s make and model.

    Before making any changes, gather baseline data of your truck’s performance. Use a dynamometer or onboard diagnostics to record metrics such as horsepower, torque, and throttle response times. This will provide a reference point to evaluate improvements following your tuning efforts.

    Next, focus on optimizing the fuel maps. By adjusting the air-fuel ratio, you can enhance combustion efficiency, leading to quicker throttle response. Ensure that your adjustments maintain a safe balance; an excessively lean or rich mixture can cause engine damage or reduced performance.

    Ignition timing is another critical setting. Advancing the timing can result in more aggressive power delivery, but it must be done carefully to avoid knock or pre-ignition. Gradually modify the ignition maps, testing each adjustment for stability and performance improvement.

    In addition, consider resetting the throttle position sensor (TPS) after adjustments. This sensor informs the ECU of the throttle plate’s position, and a recalibration can ensure that the system accurately reflects your new tuning. Properly functioning TPS settings will further enhance throttle response.

    Lastly, always test drive your truck after making adjustments. Monitor how the truck performs under various conditions, especially during acceleration. Make additional tweaks if necessary, but proceed cautiously to avoid overshooting the optimal settings.

    Fine-tuning your ECU settings can significantly enhance your truck’s throttle response, ultimately leading to a more enjoyable driving experience. Regular monitoring and adjustments will help you stay ahead in performance optimization.

    Select the Right Performance Tuning Kits for Your Truck

    Selecting the appropriate performance tuning kit is essential for optimizing your truck’s throttle response and overall performance. With various options available, it is crucial to consider several factors before making a choice.

    First, assess your truck’s make, model, and engine type. Different tuning kits are designed to cater to specific vehicles, so ensure compatibility with your truck’s engine specifications. Manufacturers often provide detailed descriptions indicating which models a particular kit supports.

    Next, determine your performance goals. Are you aiming for increased horsepower, improved torque, or enhanced fuel efficiency? Various kits focus on different aspects of performance. Some may offer a balanced enhancement across multiple metrics, while others might concentrate on maximizing one specific area. Understanding your priorities will guide you toward the right product.

    Research the tuning options available for your truck. Common types include engine control unit (ECU) re-maps, chip tuning, and plug-and-play modules. Each type has its advantages and drawbacks. ECU re-maps typically provide more comprehensive adjustments, while plug-and-play modules are easier to install and may require less technical knowledge.

    Read reviews and seek recommendations from fellow truck enthusiasts or automotive forums. Feedback from actual users can provide insight into the effectiveness, reliability, and potential drawbacks of specific tuning kits. Look for kits that consistently receive positive reviews and have a proven track record.

    Consider the brand reputation and support offered by manufacturers. Established brands often provide better customer service, warranty options, and ongoing updates, which can be beneficial for long-term performance tuning. Evaluate the quality of materials and components used in the kit, as these factors can directly influence performance gains and durability.

    Finally, think about the installation process. Some kits can be installed easily by the owner, while others may require professional installation. If you’re not comfortable with DIY projects, opt for kits that come with clear instructions or professional support services.

    By carefully evaluating these factors, you can select a performance tuning kit that enhances your truck’s throttle response and overall capabilities, providing a more enjoyable driving experience.

  • Best Classic Cars to Collect Under k

    Best Classic Cars to Collect Under $30k

    Best Classic Cars to Collect Under k

    For car enthusiasts and collectors, the world of classic cars offers an exhilarating blend of nostalgia and investment potential. While some classic models are known to fetch stratospheric prices at auctions, there remains a plethora of options that can be acquired for under thirty thousand dollars. This budget opens up a delightful realm of choices for those looking to embrace timeless automotive design without breaking the bank.

    The classic car market has shown considerable growth, attracting new collectors who appreciate the unique charm and history that these vehicles embody. From muscle cars that defined an era to European models that represent the pinnacle of craftsmanship, there are numerous styles and manufacturers to consider. Collectors can find models that not only hold their value but can also appreciate over time, making them a smart addition to any garage.

    In this article, we will delve into some of the best classic cars to consider for your collection, focusing on vehicles that offer a compelling mix of accessibility, performance, and heritage. Each entry on our list has been selected based on its reputation, availability, and overall appeal among collectors. Whether you’re a seasoned enthusiast or a newcomer to the classic car community, there is something here for everyone looking to invest in a piece of automotive history.

    Top Vintage Models for Enthusiasts on a Budget

    When it comes to collecting classic cars, enthusiasts often seek models that offer both style and historical significance without breaking the bank. Here is a selection of top vintage cars that typically fall under the $30,000 range, making them accessible options for collectors.

    The Ford Mustang (1965-1973) is an iconic model that represents American muscle cars. With its distinctive design and robust performance, early Mustangs remain popular among collectors. The availability of parts makes restoration manageable and rewarding.

    The Chevrolet Camaro (1967-1969) is another staple in the classic car community. Its aggressive styling and powerful engines provide an exhilarating driving experience. The early Camaros, especially the models equipped with the V8, are prized for their nostalgia and potential for customization.

    The Volkswagen Beetle (1960-1975) offers a different flavor of classic car charm. Renowned for its quirky design and reliability, the Beetle is an affordable option for enthusiasts who appreciate unique automotive history. Its simplicity and ease of repair enhance its appeal.

    The Datsun 240Z (1970-1973) exemplifies Japanese classic cars that have garnered a following among collectors. Known for its sporty handling and sleek lines, the 240Z offers an engaging driving experience at a relatively low price point, making it a great entry for budget-conscious collectors.

    The Pontiac Firebird (1967-1969) is a muscle car with character. With its aggressive stance and powerful engine options, the Firebird has become a sought-after classic. These models embody the spirit of the late ’60s automotive era, making them a valuable addition for any collection.

    Finally, the MG MGB (1962-1980) is a classic British roadster that combines style with affordability. Its fun-to-drive nature and open-top design make it a favorite among classic car enthusiasts. An extensive network of parts ensures that maintaining an MG is relatively straightforward, making it an excellent choice for those new to car collecting.

    In conclusion, these vintage models not only embody the spirit of their respective eras but also represent great value for enthusiasts looking to enter the world of classic car collecting without exceeding their budgets.

    Key Factors to Consider When Choosing a Collector Car

    Key Factors to Consider When Choosing a Collector Car

    Selecting a collector car requires careful consideration to ensure both enjoyment and investment potential. Here are the key factors to keep in mind:

    • Budget: Set a clear budget below thirty thousand dollars. This will guide your choices and help avoid overspending.
    • Condition: Assess the car’s current state. Look for:
      • Rust or corrosion issues
      • Original parts versus aftermarket replacements
      • Documentation of repairs and maintenance
    • Rarity: Consider how rare the model is. Limited-production vehicles or those with special editions often hold their value better.
    • Desirability: Investigate the popularity of the model among collectors. Factors influencing desirability include:
      • Performance and specifications
      • Brand reputation
      • Historical significance or iconic status
    • Future Appreciation: Research market trends to evaluate which models are likely to appreciate. Look for:
      • Emerging classics
      • Models with a strong fan base
      • Cars that have previously shown consistent price increases
    • Ease of Maintenance: Some classic cars can be expensive and difficult to maintain. Consider:
      • Availability of parts
      • Technical complexity
      • Mechanic familiarity with the model
    • Storage and Insurance: Plan for appropriate storage to protect your investment. Calculate potential insurance costs, which can vary greatly.
    • Community and Support: Look for a strong community of enthusiasts. Clubs and online forums can provide valuable resources for advice, parts, and social activities.

    By evaluating these key factors, you can make an informed decision that enhances your collector car experience while minimizing risks. Choose wisely!

    Maintenance and Restoration Tips for Classic Cars

    Maintenance and Restoration Tips for Classic Cars

    Maintaining and restoring classic cars require a combination of knowledge, patience, and dedication. Proper care not only enhances their beauty but also preserves their value. Here are some essential tips for ensuring your classic car remains in excellent condition.

    First, always keep a detailed maintenance log. Documenting repairs, services, and parts replacements will help you track the vehicle’s history and assist future restorers in understanding its condition. It’s also useful for maintaining resale value.

    Regular oil changes are crucial. Classic cars often use different oils than modern vehicles. Choose the right oil type based on the manufacturer’s recommendations and replace it regularly to ensure optimal engine performance.

    Inspect the electrical system frequently. Check for corroded wires, weak connections, and faulty fuses. Many classic cars have outdated wiring systems that can be prone to issues. Upgrading to modern wiring harnesses can improve reliability.

    Pay special attention to the cooling system. Overheating can cause catastrophic engine damage. Regularly check hoses, radiators, and coolant levels. Consider adding a modern electric fan for improved cooling efficiency.

    Rust prevention is vital. Ensure the undercarriage and bodywork are rust-free. Clean and treat vulnerable areas with rust inhibitors. If you find rust, address it promptly with suitable repair techniques, such as welding or using rust converters.

    When restoring, prioritize originality but be open to improvements. Use OEM (Original Equipment Manufacturer) parts when possible, as these maintain authenticity and value. However, modern upgrades to brakes and suspension can enhance safety and drivability.

    Interior restoration is equally important. Clean, condition, and restore leather or fabric upholstery. Replace worn components but strive to keep the original aesthetic. Use products specifically designed for classic materials.

    Finally, invest in quality tools and resources. Join classic car clubs or online forums for knowledge sharing. Access to experienced enthusiasts can provide invaluable insights and support during your restoration journey.

  • Top Modifications for Your 4×4 Vehicle

    Top Modifications for Your 4×4 Vehicle

    Top Modifications for Your 4×4 Vehicle

    In the world of off-roading, having a reliable and high-performing 4×4 vehicle is essential for tackling rugged terrains and challenging conditions. Upgrading your vehicle not only enhances its capabilities but also ensures that you can navigate through obstacles with confidence. Various modifications can be made to improve traction, power, and overall durability, making your adventures more enjoyable and safe.

    When considering performance upgrades, it’s crucial to identify areas that would yield the most significant benefits. Enhancements such as advanced suspension systems, high-performance tires, and engine tunings can transform your standard 4×4 into an extraordinary off-road machine. Each modification addresses specific challenges, from increasing ground clearance to improving grip on slippery surfaces.

    Ultimately, the right upgrades can dramatically increase your vehicle’s reliability and efficiency, offering better handling and control in extreme conditions. This article will explore the most effective modifications available for enhancing your 4×4 vehicle’s performance, enabling you to conquer both the beaten path and the unknown.

    High-Performance Tires for Enhanced Traction

    Upgrading to high-performance tires is one of the most effective ways to enhance the traction of your 4×4 vehicle. These tires are specifically designed to provide improved grip on various surfaces, whether you’re tackling rocky trails, muddy terrain, or snowy roads. The type of rubber compound used in high-performance tires typically offers better flexibility and stickiness, which translates to superior traction.

    One of the key features of high-performance tires is their tread pattern. Aggressive tread designs, such as deep grooves and multi-directional patterns, facilitate optimal water displacement and enhance grip on soft or loose surfaces. This design minimizes the risk of hydroplaning on wet terrain, ensuring stability and control.

    When selecting high-performance tires, consider the service rating that matches your driving style. For off-road enthusiasts, tires with a tougher sidewall construction are essential, as they withstand harsh conditions and resist punctures. Additionally, some tires come with reinforced sidewalls that provide extra protection without compromising flexibility.

    Temperature management is another factor to keep in mind. High-performance tires are engineered to perform well under various temperature ranges, ensuring that they maintain grip in both cold and hot conditions. Proper tire pressure must also be maintained to maximize performance and traction; under-inflated or over-inflated tires can lead to reduced contact with the ground.

    Furthermore, tread wear is a natural part of using any tire, but high-performance tires often incorporate wear indicators that alert you when it’s time for a change. Regularly inspecting your tires will help in maintaining optimal traction and ensuring your vehicle’s performance is at its best.

    Investing in high-performance tires can drastically improve your 4×4’s handling characteristics, making it crucial for any serious off-road enthusiast or daily driver looking for enhanced performance. Whether your endeavors include challenging trails or everyday commutes, the right tires serve as the vital connection between your vehicle and the driving surface.

    Aftermarket Suspension Systems for Off-Road Stability

    Aftermarket Suspension Systems for Off-Road Stability

    Upgrading your 4×4 vehicle’s suspension system is crucial for enhancing off-road performance and stability. Aftermarket suspension systems are specifically designed to provide better articulation, ground clearance, and overall handling on rugged terrains. These systems improve both comfort and control, allowing drivers to tackle obstacles with confidence.

    One of the key benefits of aftermarket suspension systems is improved shock absorbers. High-performance shocks are able to absorb impacts from uneven surfaces, reducing wear on both the vehicle and the driver. Options such as adjustable coilovers or long-travel shocks offer greater flexibility to fine-tune the ride height and firmness, catering to the specific demands of off-road conditions.

    Additionally, a well-designed suspension system enhances wheel alignment and connection with the ground. Upgraded components like control arms, bushings, and sway bars contribute significantly to stability during acceleration, braking, and cornering. This ensures that all four wheels maintain optimal contact with the terrain, improving traction and reducing the risk of rollovers.

    Furthermore, a suspension lift kit can provide essential ground clearance, allowing your vehicle to navigate over larger boulders and deep ruts without damaging crucial undercarriage components. This increased height not only improves obstacle negotiation but also enables the installation of larger tires, further enhancing traction and stability.

    When selecting an aftermarket suspension system, consider your specific off-road needs and driving style. Systems designed for aggressive trail use will differ from those aimed at overlanding. Be sure to choose components that are compatible with your vehicle and installed by professionals for optimal performance.

    In conclusion, investing in a high-quality aftermarket suspension system can greatly improve your 4×4 vehicle’s off-road stability, comfort, and capability. It ensures that your adventures are not only exciting but also safe, maximizing your off-road experience.

    Engine Tuning and Air Intake Modifications for Power Boost

    Engine Tuning and Air Intake Modifications for Power Boost

    Upgrading your 4×4 vehicle’s performance often starts with effective engine tuning and enhancing the air intake system. These modifications can significantly increase horsepower and torque, allowing your vehicle to perform optimally in various conditions.

    Engine tuning involves adjusting the engine’s parameters through software reprogramming or the installation of new performance chips. This process optimizes the fuel-to-air ratio, ignition timing, and other critical settings, ensuring that the engine runs more efficiently. A well-tuned engine can unlock hidden power, improve throttle response, and even enhance fuel economy under certain driving conditions.

    When considering air intake modifications, it’s essential to focus on increasing airflow to the engine. A performance air intake system replaces stock components with options that allow for a greater volume of air while lowering intake temperatures. This improvement leads to more oxygen entering the combustion chamber, which, when combined with proper tuning, results in a noticeable boost in power output.

    Common upgrades include high-flow air filters, intake manifolds, and cold air intakes. High-flow filters improve filtration while minimizing airflow restriction, ensuring a continuous supply of clean air. Cold air intakes draw in cooler, denser air from outside the engine compartment, providing additional power over standard systems that may pull in warmer air.

    Implementing both engine tuning and air intake modifications not only enhances performance but can also lead to better throttle response and acceleration. Additionally, these upgrades can make off-road driving more enjoyable by providing the necessary power to conquer challenging terrains with ease.

    Before proceeding with any modifications, it’s advisable to consult with a professional tuner or mechanic who specializes in 4×4 vehicles. They can provide tailored recommendations based on your vehicle’s make and model, ensuring the upgrades deliver the desired performance boost while maintaining reliability.

  • How to Choose the Right Hitch for Your Truck

    How to Choose the Right Hitch for Your Truck

    How to Choose the Right Hitch for Your Truck

    Selecting the right hitch for your truck can often feel overwhelming, given the myriad options available on the market. A hitch is not just an accessory; it’s a crucial component that ensures the safety and efficiency of your towing endeavors. Understanding the different types of hitches and their specific applications is essential for maximizing your truck’s capabilities and ensuring a seamless towing experience.

    When considering a hitch, it’s important to take into account the weight capacity, the type of trailer you plan to tow, and your truck’s specifications. Each hitch type serves a distinct purpose, from traditional receiver hitches to specialized fifth wheels. Making an informed choice requires an understanding of these variations, allowing you to match the right hitch with your unique towing needs.

    In this guide, we’ll break down the essential factors to consider when choosing a hitch for your truck, simplifying the selection process so you can make an informed decision with confidence. Whether you’re a seasoned hauler or a novice looking to embark on new journeys, understanding the essential components of hitch selection will enhance your towing experience and keep your vehicle and cargo secure on the road.

    Understanding Different Types of Hitches

    Understanding Different Types of Hitches

    Hitches are essential components for towing, and understanding the various types can significantly impact your towing experience. Each hitch type is designed for specific applications, load capacities, and vehicle compatibility.

    The most common hitch type is the Ball Hitch, which uses a spherical ball to connect the trailer to the vehicle. It’s versatile and widely used for light to moderate towing, such as small trailers, boats, and campers. Ball hitches come in different sizes, typically 1-7/8″, 2″, and 2-5/16″, accommodating varying load capacities.

    For heavier loads, the Weight Distribution Hitch is ideal. This hitch system distributes the trailer’s weight across the tow vehicle and trailer axles, enhancing stability while towing. It’s often used for larger trailers, such as fifth wheels and goosenecks. Proper setup is crucial to ensure balanced weight distribution and safe towing.

    Fifth Wheel Hitches are specifically designed for towing heavy trailers, commonly associated with RVs and horse trailers. Mounted in the truck bed, they provide a stable connection through a hitch plate that locks into the trailer’s kingpin. Fifth wheel hitches offer better maneuverability and weight distribution compared to standard ball hitches.

    The Gooseneck Hitch is another option for heavy towing. Similar to the fifth wheel, it is installed in the truck bed but connects via a coupler ball to the trailer’s gooseneck. This hitch excels in towing large cargo, making it popular in agricultural and commercial applications.

    Finally, the Pintle Hitch is designed for extreme towing situations, commonly found in military, construction, or agricultural settings. It consists of a hook-and-loop system, providing robust connections for heavy loads. While it may not be as common for everyday consumer use, it’s invaluable for heavy-duty applications.

    Understanding these hitch types will help you choose the right one for your needs, ensuring safer and more effective towing. Always consider your vehicle’s towing capacity and compatibility before making a purchase.

    Assessing Your Truck’s Towing Capacity

    Assessing Your Truck's Towing Capacity

    Understanding your truck’s towing capacity is crucial for safe and effective hauling. Towing capacity refers to the maximum weight your vehicle can safely tow, which varies based on several factors including engine size, drivetrain configuration, and overall design. To accurately assess this capacity, it’s essential to consult your owner’s manual or the manufacturer’s specifications for your specific truck model.

    Begin by locating the Gross Vehicle Weight Rating (GVWR), which indicates the maximum weight the truck can handle, including its own weight and any additional cargo. Next, identify the Gross Trailer Weight (GTW), which is the total weight of the trailer and its contents. The towing capacity is effectively the difference between the GVWR and the weight of the truck when loaded.

    Another important factor is the Tongue Weight (TW), which is the downward force exerted by the trailer on the hitch. This weight generally should be 10% to 15% of the total trailer weight to maintain stability and control during towing. Overloading the truck can lead to steering difficulties, braking issues, and increased wear on the vehicle.

    Additionally, consider the hitch rating, which specifies the maximum weight the hitch can handle safely. Ensure that the hitch is compatible with your truck’s towing capacity, as mismatches can lead to catastrophic failures.

    Lastly, always factor in any aftermarket modifications that may impact towing capabilities, such as suspension upgrades or enhancements to the braking system. By thoroughly assessing these elements, you can ensure that your truck is equipped to handle the loads you plan to tow safely.

    Installation Tips and Considerations for Your Hitch

    When installing a hitch on your truck, start by ensuring you have the right tools and equipment. A standard set typically includes a socket wrench, torque wrench, drill, and level. Always read the manufacturer’s instructions before beginning the installation process to familiarize yourself with specific requirements for your hitch model.

    Before mounting the hitch, verify that your truck’s frame is clean and free from debris. This can help achieve a secure fit and prevent rusting. Additionally, check your truck’s weight capacity to ensure the hitch you selected can safely handle your intended loads.

    During installation, align the hitch properly with the mounting holes on your truck’s frame. It’s advisable to leave all bolts loose initially to make adjustments easier. Once the hitch is in position, tighten the bolts gradually, following the torque specifications recommended in the installation manual. This helps distribute the force evenly across the hitch and frame.

    Consider using a friend or a spotter to hold the hitch in place during installation, especially for heavier models. This extra set of hands can help maintain alignment and stability while you secure the hitch.

    After installation, double-check all bolts and connectors to ensure they are tightened to the required torque. It’s also beneficial to perform a periodic inspection of the hitch and its connections after a few uses, looking for signs of wear or damage that could compromise safety.

    Finally, consider adding accessories such as wiring harnesses for trailer lights or a hitch lock for added security. These can enhance your towing experience and provide peace of mind while on the road.

  • Understanding Vehicle History Reports

    Understanding Vehicle History Reports

    Understanding Vehicle History Reports

    When considering the purchase of a pre-owned vehicle, understanding its background is crucial. A Vehicle History Report (VHR) serves as an essential tool, providing potential buyers with vital information about a car’s past. This report offers insights into accidents, service records, ownership changes, and more, helping buyers make informed decisions and avoid potential pitfalls.

    One of the primary advantages of a VHR is its ability to reveal any odometer discrepancies, which can be a red flag indicating potential fraud. Buyers can also find out if the vehicle has been declared a total loss or has sustained severe damage in the past. Knowing this information can save buyers from unforeseen expenses in the future and protect them from purchasing a vehicle that may be unsafe or unreliable.

    Additionally, a thorough VHR can shed light on the car’s maintenance history, including routine service and repairs. This record can help assess the vehicle’s overall condition and longevity. By being aware of the maintenance practices followed by previous owners, buyers can gauge how well the car has been cared for and determine whether it’s worth the investment.

    Understanding the Importance of Vehicle History Reports for Buyers

    Understanding the Importance of Vehicle History Reports for Buyers

    Vehicle history reports (VHRs) are essential tools for prospective buyers, providing a comprehensive overview of a vehicle’s past. These reports consolidate various pieces of information that can significantly influence a purchasing decision, ensuring buyers are well-informed before committing to a purchase.

    One of the primary benefits of a VHR is the transparency it offers regarding the vehicle’s previous ownership. Buyers can verify facts such as the number of previous owners, which can indicate how well the car has been cared for. A higher number of owners in a short time may suggest potential issues that buyers should investigate further.

    Additionally, VHRs include critical data on the vehicle’s accident history. Knowing whether a vehicle has been involved in a major crash can help assess its structural integrity and potential future reliability. Buyers often prefer vehicles with clean accident records, as past damage can affect resale value and long-term performance.

    Another crucial element included in vehicle history reports is mileage verification. Discrepancies in odometer readings signal potential odometer rollbacks, a form of fraud that can mislead buyers regarding the true wear and tear on the vehicle. VHRs help prevent such deceptions, allowing buyers to make decisions based on accurate information.

    Lastly, VHRs provide insight into any title issues that may arise, such as salvage titles or liens. Vehicles with salvage titles have been declared a total loss by insurers, which can lead to complications when registering or insuring the vehicle. Understanding the title status ensures buyers can avoid potential legal and financial pitfalls.

    In summary, vehicle history reports are invaluable for buyers. They ensure informed decisions by revealing critical details about a vehicle’s past, including ownership history, accident occurrences, mileage accuracy, and title integrity. Utilizing VHRs can lead to smarter purchases, ultimately saving time, money, and potential stress in the long run.

    Deciphering Key Components of a Vehicle History Report

    Deciphering Key Components of a Vehicle History Report

    A Vehicle History Report (VHR) is an essential resource for prospective car buyers, providing a detailed account of a vehicle’s past. Understanding its components can help you make informed purchasing decisions. Here are the key elements to look for:

    Title Information: This section reveals whether the vehicle has a clean title or if it has been salvaged, rebuilt, or otherwise branded. A salvaged title suggests significant damage or insurance claims, impacting the vehicle’s market value.

    Accident History: Reports typically include details of any accidents the vehicle has been involved in, as well as the extent of damage. Understanding the severity of past collisions can help assess potential repair needs and long-term reliability.

    Service History: Regular maintenance records may be provided, showcasing previous owners’ investment in upkeep. Vehicles with comprehensive service histories often indicate that the owner prioritized maintenance, which could lead to better performance and longevity.

    Odometer Record: This component reveals the vehicle’s mileage at various points in time. Look for discrepancies that may suggest odometer rollback or fraud. Consistent readings over the years are a positive sign of authentic ownership.

    Ownership History: The VHR will typically outline the number of previous owners and the duration of each ownership period. Frequent ownership changes may raise concerns about the vehicle’s reliability or hidden issues.

    Liens and Loans: It is crucial to identify any outstanding liens on the vehicle, which could affect transfer of ownership. Knowing if the vehicle has been financed or if there are unpaid debts can protect you from potential legal disputes.

    Recalls: Many reports will include a list of any recalls that have been issued for the vehicle. Ensuring that all recalls have been addressed can enhance safety and prevent future problems.

    Environmental Issues: Some VHRs also provide information on whether the vehicle has been reported for environmental issues, such as being used in flood conditions or other hazardous environments. This information is vital for assessing potential long-term damage.

    By analyzing these components, you can gain a thorough understanding of a vehicle’s background, allowing for a more confident and secure purchase decision.

    Common Red Flags to Watch for in Vehicle History Reports

    When reviewing a vehicle history report, it’s crucial to identify potential red flags that may indicate underlying issues. Here are several common warning signs to be aware of:

    1. Title Issues: Look for discrepancies in the title status. A salvage, rebuilt, or junk title can indicate significant prior damage. Ensure the title is clean to avoid hidden problems.

    2. Odometer Rollbacks: Check the odometer readings for irregularities. If a vehicle’s mileage appears inconsistent over time, it may suggest tampering or fraud.

    3. Multiple Owners: A vehicle changing hands frequently may signal unresolved issues, such as mechanical problems or a poor reputation. Be cautious with cars that have numerous previous owners.

    4. Accident History: Review any reported accidents. Minor accidents may not be concerning, but extensive damage or multiple incidents can point to future reliability issues.

    5. Service and Maintenance Records: A lack of regular maintenance records can indicate neglect. Infrequent servicing might lead to significant repair costs down the line.

    6. Flood Damage: Vehicles with a history of flood damage can suffer from lasting electrical and mechanical issues. Any indication of previous flooding should raise alarms.

    7. Lemon Law Buybacks: If a vehicle has been returned under lemon laws, it implies persistent problems. Be wary of buying a car with this history.

    8. Extensive Mechanical Repairs: Frequent major repairs can suggest ongoing reliability issues. Analyze repair history carefully to gauge the vehicle’s overall condition.

    9. Emission Issues: Past problems with emissions testing can point to underlying engine or exhaust system issues. Ensure the vehicle meets regulatory standards.

    10. Recalls: Check if the vehicle has any outstanding recalls. Unaddressed recalls can pose safety risks and potential financial liabilities.

    By keeping an eye out for these common red flags, you can make more informed decisions and avoid costly surprises when purchasing a used vehicle.

  • Best Trails for Off-Roading in the U.S.

    Best Trails for Off-Roading in the U.S.

    Best Trails for Off-Roading in the U.S.

    For adventure seekers and outdoor enthusiasts, the United States offers a diverse range of off-road trails that promise exciting exploration and breathtaking scenery. From rugged mountains to expansive deserts, these trails cater to all types of off-road vehicles and skill levels, making them ideal for families, solo travelers, and hardcore adventurers alike. Each destination presents unique challenges and unforgettable experiences that can create lasting memories.

    Among the myriad of options, some trails stand out not only for their natural beauty but also for the thrill they provide. The vast landscapes are often home to an array of wildlife, cultural landmarks, and historical sites, enriching the off-roading experience. Whether you prefer navigating through rocky terrains, driving along scenic coastal paths, or cruising across sandy dunes, there’s a trail waiting to be discovered.

    In this article, we will explore some of the best off-road trails in the United States that promise to inspire and excite. We will delve into what makes each trail special, including its level of difficulty, points of interest, and essential tips for a safe and enjoyable journey. Prepare to rev your engines and embark on an unforgettable adventure across some of the most stunning backroads in the country.

    Best Off-Road Trails to Explore Across the U.S.

    Best Off-Road Trails to Explore Across the U.S.

    Off-roading in the United States offers a diverse range of terrains, from rocky mountains and sandy deserts to lush forests. Here’s a look at some of the best trails that showcase the beauty and adventure of off-road driving.

    • Moab, Utah
      • Hell’s Revenge: Known for its slickrock formations and challenging obstacles, this trail offers stunning views and thrilling climbs.
      • Fins and Things: A family-friendly trail with moderate difficulty, it’s great for testing your skills on rocky terrain while enjoying beautiful vistas.
    • Rubicon Trail, California
      • Rubicon Trail: A legendary route in the Sierra Nevada, it challenges drivers with boulders and steep sections, suitable for experienced off-roaders.
    • Big Bend National Park, Texas
      • Old Ore Road: This rugged road meanders through desert landscapes, providing breathtaking views of the Chisos Mountains and Chihuahuan Desert.
    • Death Valley National Park, California
      • Wildrose Peak: A moderate trail leading to a rewarding summit with panoramic views of the stunning Death Valley landscape.
      • Echo Canyon: A more challenging route with rocky terrain, it’s suitable for those seeking an adventurous drive.
    • Ocala National Forest, Florida
      • Juniper Springs Loop: This trail offers a unique experience through sandy paths and lush vegetation, ideal for both novice and seasoned off-roaders.
    • The Pine Barrens, New Jersey
      • Pinelands: A network of sandy roads and trails through unique pine forests, perfect for those looking to explore in a more secluded environment.
    • Colorado Backcountry
      • Imogene Pass: A high-altitude trail reaching over 13,000 feet, offering panoramic mountain views and a thrilling driving experience.
      • Engineer Pass: Another challenging route with breathtaking scenery, leading drivers through rugged mountains and historic mining areas.

    Whether you’re a seasoned off-roader or a beginner, these trails provide a variety of challenges and stunning landscapes to enjoy. Always remember to pack appropriately, follow local regulations, and prioritize safety while exploring the diverse terrains of the U.S.

    Top 5 Off-Road Trails for Beginners to Navigate

    Exploring the great outdoors on four wheels can be an exhilarating experience, especially for beginners looking to embark on off-road adventures. Here are five trails across the United States that provide a great introduction to off-roading while ensuring a safe and enjoyable experience.

    1. Iron Mountain Road, South Dakota
    Iron Mountain Road offers a scenic 17-mile route through the Black Hills. This trail features stunning views, winding turns, and several tunnels cut through the mountains. With manageable terrain and plenty of pull-off spots for photography, it’s perfect for novice drivers to practice their skills in a breathtaking environment.

    2. Kettle Moraine Scenic Drive, Wisconsin
    The Kettle Moraine Scenic Drive is a beautiful route that showcases the unique glacial landscape of Wisconsin. The trail is mostly gravel and has numerous soft paths for beginners. It allows for easy navigation and provides access to various recreational areas, picnic spots, and stunning views of glacial landforms.

    3. Tahuya State Forest, Washington
    This trail system offers a combination of beginner-friendly routes and more challenging terrains. Tahuya State Forest is well maintained, with numerous forest roads and trails designed for all skill levels. Beginners can confidently explore while enjoying the lush surroundings of the Pacific Northwest.

    4. Ocotillo Wells State Vehicular Recreation Area, California
    With over 80,000 acres of desert landscape, Ocotillo Wells is a fantastic place for beginners to learn off-roading. The area provides a variety of trails that range from flat and sandy to gentle hills, giving new drivers the chance to get accustomed to their vehicles in an expansive space suitable for exploration and fun.

    5. Moab Rim, Utah
    While some parts of Moab are known for their extreme trails, the Moab Rim offers a moderate option for beginners. This trail boasts breathtaking views of the Colorado River and offers a mix of dirt and rocky terrain. It’s an excellent choice for newcomers to experience the excitement of off-roading while being guided by more experienced drivers if desired.

    Advanced Off-Road Trails for Experienced Drivers

    Advanced Off-Road Trails for Experienced Drivers

    For seasoned off-road enthusiasts seeking a challenge, the United States offers some of the most demanding trails that test both driving skills and vehicle capabilities. These advanced trails are characterized by steep inclines, rocky terrains, deep mud, and unpredictable weather conditions, making them ideal for experienced drivers who thrive on adventure.

    The Rubicon Trail in California is renowned for its rugged beauty and technical difficulties. Spanning approximately 22 miles, it features boulder-strewn paths, water crossings, and steep drop-offs, demanding precise vehicle handling and a well-equipped 4×4. This trail provides unmatched scenic vistas of the Sierra Nevada mountains and challenging obstacles that require a skilled driver.

    Another remarkable option is Moab’s Hell’s Revenge in Utah. This trail is famous for its slickrock surfaces and steep climbs, including the infamous Hell’s Gate. Traversing this route requires not only advanced off-road driving techniques but also a vehicle capable of navigating its extreme angles and drops. The stunning red rock landscape adds to the adrenaline rush as drivers conquer the challenges laid out before them.

    In Colorado, the Black Bear Pass presents a thrilling experience with its dramatic switchbacks and narrow paths. The trail, known for its breathtaking views and high altitude, is often pursued by those with off-road experience. The descent into Telluride is particularly treacherous, necessitating caution and skill as drivers navigate steep, loose gravel and tight corners.

    For those looking for a different kind of challenge, the Pine Barrens in New Jersey provides sandy trails that can be difficult to maneuver, particularly in wet conditions. This area features intricate root systems, deep ruts, and a mix of terrain types, making it perfect for the off-road driver who enjoys a varied landscape and is ready to tackle its unpredictable nature.

    Lastly, the Alvord Desert in Oregon offers a unique experience with its dry lake beds and expansive openness. While it may seem like an easy drive, the vast expanse can quickly lead to challenges, especially when drivers venture off the beaten path. Navigating the varying textures of the terrain requires a sharp eye and adept maneuvering skills.

    Exploring these advanced off-road trails demands not only a capable vehicle but also a wealth of experience and preparation. Proper research, safety gear, and a fellow adventurer or spotter are essential for ensuring a safe and enjoyable journey through these challenging environments.

    Tips for Planning Your Off-Road Adventure Safely

    Planning an off-road adventure requires careful consideration to ensure safety and enjoyment. Here are essential tips to take into account:

    1. Choose the Right Vehicle: Ensure your vehicle is equipped for off-road conditions. Consider factors such as ground clearance, traction, and durability. A four-wheel drive vehicle is often recommended for tackling rough terrains.

    2. Know the Terrain: Research the trails you intend to explore. Understand their difficulty levels, potential hazards, and weather conditions. Familiarize yourself with maps and GPS coordinates to avoid getting lost.

    3. Prepare Your Gear: Pack essential gear including a first aid kit, spare tire, tool kit, and recovery equipment like a winch or tow strap. Bring appropriate clothing, food, and water, especially for longer excursions.

    4. Travel with a Buddy: It’s safer to travel in groups. Having a companion allows for mutual assistance in case of emergencies. If possible, inform someone about your route and expected return time.

    5. Check the Weather: Monitor weather forecasts prior to your trip. Off-road conditions can change rapidly, and inclement weather can make trails hazardous. Be prepared to postpone your adventure if necessary.

    6. Respect Nature and Follow Rules: Adhere to local regulations and trail guidelines. Stay on marked paths to minimize environmental impact. Be mindful of wildlife and other outdoor enthusiasts.

    7. Practice Off-Road Techniques: Familiarize yourself with driving skills required for off-road conditions. Practice techniques such as hill climbs, descents, and navigating obstacles in safe, controlled environments before your adventure.

    8. Stay Connected: Ensure your mobile device is charged and consider bringing a portable charger. Having a two-way radio can also facilitate communication, especially in remote areas where cell service might be limited.

    By taking these precautions, you can enhance your off-road adventure while ensuring a safe and enjoyable experience for yourself and your companions.

  • Truck Sales by Brand – 2024 Rankings

    Truck Sales by Brand – 2024 Rankings

    Truck Sales by Brand – 2024 Rankings

    As the demand for trucks continues to rise in 2024, understanding the sales rankings of various brands becomes crucial for both consumers and industry players. This year’s data reveals shifting trends in the automotive market, influenced by innovations in technology, fuel efficiency, and consumer preferences. With more manufacturers entering the landscape, the competition is fiercer than ever, making it essential to analyze which brands lead the pack.

    In this article, we will delve into the top-selling truck brands of 2024, providing insights into their performance and the factors contributing to their success. By examining sales figures, market strategies, and consumer feedback, we aim to highlight the key players that have shaped the truck market this year. Whether you’re a potential buyer or a seasoned industry professional, understanding these rankings will enable informed decisions in the evolving landscape of truck sales.

    Join us as we explore the intricacies of the truck market, identifying the brands that have not only captured a significant share of sales but also set the standard for excellence in performance and reliability. The insights drawn from these rankings will provide a comprehensive overview of what the future holds for truck enthusiasts and manufacturers alike.

    Analyzing the Top 10 Truck Brands in 2024: Sales Data and Trends

    Analyzing the Top 10 Truck Brands in 2024: Sales Data and Trends

    In 2024, the truck sales landscape is shaped by a combination of consumer preference, technological advancements, and economic factors. The top 10 truck brands have shown remarkable performance, with data highlighting key trends that have influenced their market positions.

    Leading the rankings is Ford, maintaining its dominance with the F-Series, which continues to capture a significant share of the full-size truck market. The brand has benefitted from strong brand loyalty, innovative features, and a reputation for durability. Its sales figures reflect a robust increase compared to previous years.

    Chevrolet follows closely behind with the Silverado, which remains a favorite among both work and leisure users. Chevy has focused on improving fuel efficiency and incorporating advanced technology in its models, appealing to environmentally conscious consumers and tech-savvy drivers alike.

    Ram trucks, known for their comfort and luxury features, have surged in popularity, helping the brand secure a solid third position. The introduction of new models and special editions has revitalized interest, contributing to a higher sales volume year-on-year.

    Toyota’s Tundra holds a commendable place in the rankings, largely due to its reliability and strong resale value. The brand has strategically targeted the off-road and adventure market, investing in features that enhance capability and performance.

    Nissan’s Titan has seen a steady rise in sales attributed to improved marketing strategies and competitive pricing. As consumer interest shifts towards more versatile options, Nissan has focused on enhancing vehicle specifications and availability in various configurations.

    GMC, with its Sierra model, emphasizes premium features and performance. The brand’s focus on upscale finishes and advanced technology has attracted a niche market willing to pay a premium for luxury and utility combined.

    Honda’s Ridgeline continues to capture attention with its unique unibody design, appealing to urban dwellers and families seeking functionality in a truck. Sales have improved significantly due to its adaptability and comfort, which differentiates it from traditional body-on-frame trucks.

    Hyundai and Kia, though traditionally known for passenger vehicles, have entered the truck market, showing promising growth. Their focus on modern design and competitive pricing has attracted younger consumers and those new to truck ownership.

    Last but not least, the emerging electric truck brands are beginning to make an impact. Companies like Rivian and Tesla are redefining consumer expectations regarding performance and sustainability. As these models gain traction, they are expected to disrupt the established order, calling for established brands to adapt quickly.

    Overall, the trends observed in 2024 indicate a shift towards increased sustainability, technology integration, and consumer-focused innovations across the truck market. Brands that successfully embrace these changes are likely to see continued growth in the competitive landscape.

    Key Features and Specifications Driving Sales in Popular Truck Models

    Key Features and Specifications Driving Sales in Popular Truck Models

    In the competitive truck market of 2024, several key features and specifications influence consumer preferences and drive sales. One of the primary factors is towing capacity. Trucks that offer higher towing capacities allow consumers to transport heavy loads confidently, making them appealing to both personal and commercial users.

    Engine performance also plays a critical role. Many modern trucks are equipped with powerful V6 or V8 engines that provide excellent horsepower and torque, enhancing both performance and fuel efficiency. Hybrid and electric truck variants are gaining traction, appealing to environmentally conscious buyers by offering reduced emissions and lower operating costs.

    Safety features are increasingly important in the truck segment. Advanced driver-assistance systems, such as adaptive cruise control, lane-keeping assist, and automatic emergency braking, are commonly found in popular models. Trucks that have received high safety ratings from organizations like the National Highway Traffic Safety Administration (NHTSA) tend to attract more buyers.

    Technology integration has become a distinguishing factor, with many trucks now featuring advanced infotainment systems that support smartphone connectivity, built-in navigation, and premium sound systems. Features such as wireless charging and multiple USB ports cater to the tech-savvy consumer.

    Interior quality and comfort cannot be overlooked. Spacious cab designs with high-quality materials and ergonomic seating elevate the driving experience. Models that offer customizable interior options and a variety of trim levels provide buyers with more choices to match their preferences.

    Finally, brand reputation and reliability impact consumer trust and purchase decisions. Brands that consistently deliver quality and stand behind their products with strong warranties often see higher sales. Overall, the combination of performance, safety, technology, and comfort defines the best-selling trucks of 2024.

    Regional Variations in Truck Sales: Understanding Brand Preferences

    Truck sales in 2024 exhibit significant regional variations influenced by factors such as geography, climate, and consumer lifestyle. Understanding these preferences is essential for manufacturers and dealerships aiming to optimize their marketing strategies and inventory management.

    In the Midwest, for instance, brands like Ford and Chevrolet dominate the market. These trucks are favored for their ruggedness and reliability, making them ideal for agricultural and industrial applications. The diverse landscapes, ranging from flat farmlands to hilly regions, lead to a high demand for vehicles that excel in towing capacities and off-road capabilities.

    Conversely, the West Coast shows a preference for smaller, fuel-efficient trucks, with brands such as Toyota and Honda gaining popularity. Urban areas like Los Angeles favor compact models that offer versatility without sacrificing performance, catering to both work and leisure activities. Additionally, a growing interest in environmentally friendly options has spurred the demand for hybrid and electric truck models.

    The South presents another contrast, where full-sized pickups from brands like Ram and GMC are favored. The combination of open spaces and a strong culture of outdoor activities drives the preference for larger trucks that can handle heavy loads and off-road adventures. Furthermore, brands that emphasize technology and luxury features have seen increased traction in this region, appealing to consumers looking for comfort alongside capability.

    In the Northeast, consumer preferences lean towards trucks that balance utility with urban practicality. Here, brands like Nissan and Subaru have carved out a niche with models that provide all-wheel drive and advanced safety features. The challenging weather conditions and urban environments demand vehicles that are manageable in city traffic while still offering the utility expected of a truck.

    Understanding these regional preferences allows manufacturers to tailor their offerings, focusing on the specifications, features, and marketing tactics that resonate with local buyers. As the truck market evolves, acknowledging these variations becomes crucial for driving sales and customer satisfaction in 2024 and beyond.

  • How to Back Up with a Trailer Like a Pro

    How to Back Up with a Trailer Like a Pro

    How to Back Up with a Trailer Like a Pro

    Backing a trailer can be a daunting task for both novice and experienced drivers alike. It requires a combination of spatial awareness, motor skills, and precise control of your vehicle. Understanding the fundamentals of trailer backing is crucial not only for safety but also for enhancing the overall efficiency of your hauling operations.

    Effective trailer backing techniques are essential for a variety of scenarios, whether you’re maneuvering in tight spaces at a campsite, navigating busy parking lots, or positioning a trailer at a work site. Each situation presents its own challenges, making it imperative to master the skills necessary for successful backing. This article will delve into the key techniques that can help you become proficient in trailer backing.

    In this guide, we will highlight important strategies, including the use of mirrors, the significance of slow movements, and the essential role of understanding trailer dynamics. By honing these skills, you will not only boost your confidence but also ensure a safer experience on the road. Let’s embark on the journey to mastering these vital techniques for trailer backing success.

    Understanding the Fundamentals of Trailer Dynamics

    Trailer dynamics involve the interactions between the towing vehicle and the trailer, influencing how they respond to steering inputs, braking, and acceleration. Understanding these principles is crucial for effective backing techniques and safe maneuvering.

    The center of gravity (CG) of the trailer plays a significant role in its behavior. A trailer with a low CG is more stable and less prone to swaying compared to one with a high CG. When backing, the position of the load can also alter the GPS, affecting how the trailer tracks behind the vehicle. Ensuring that the load is evenly distributed will enhance control and stability.

    Another key aspect is the wheelbase of both the towing vehicle and the trailer. A longer wheelbase generally provides more stability but requires more space for maneuvering. Conversely, a shorter wheelbase allows for tighter turns but may result in instability, especially at higher speeds or on uneven surfaces.

    Additionally, the turning radius of the trailer is inherently different from that of the towing vehicle. When backing, the trailer will pivot around the hitch point. Understanding this pivot point is essential to accurately predict the trailer’s path. As the driver turns the steering wheel, the front of the vehicle swings in one direction while the trailer moves in the opposite direction initially, leading to a zigzagging effect. Mastering this concept is vital for precise backing.

    Furthermore, the relationship between speed and steering input is critical. At lower speeds, more deliberate and gradual steering inputs are required to maintain control, while higher speeds may necessitate more assertive movements due to the increased momentum. Recognizing the proper speed for backing maneuvers can minimize the risk of oversteering and misalignment.

    Finally, understanding the forces at play, such as friction and inertia, can aid in trailer management. Friction between the trailer tires and the ground impacts how swiftly the trailer responds to steering changes. When the trailer begins to sway, managing inertia becomes essential. Quick corrective actions may help realign the trailer with the towing vehicle to restore stability.

    In summary, grasping the dynamics of trailer behavior, including CG, wheelbase effects, turning radius, speed relations, and frictional forces, will lead to improved backing precision and enhanced safety.

    Step-by-Step Guide to Achieving Precise Backing Maneuvers

    Step-by-Step Guide to Achieving Precise Backing Maneuvers

    Mastering trailer backing requires practice and a methodical approach. Follow these steps to achieve precise backing maneuvers, ensuring safety and control.

    Step 1: Preparation

    Before attempting to back up your trailer, ensure that all necessary equipment is in place. Check that your mirrors are adjusted correctly for maximum visibility. Confirm that the trailer is securely attached to the towing vehicle.

    Step 2: Assess the Environment

    Examine your surroundings to identify any obstacles, including pedestrians, other vehicles, and low-hanging branches. Ensure you have ample space for the backing maneuver and that the area is clear of distractions.

    Step 3: Positioning

    Begin by positioning your vehicle parallel to the trailer. This initial alignment is critical for a smooth backing process. Ensure the back of the vehicle is approximately one to two feet away from the trailer, allowing for a controlled turn.

    Step 4: Use the Mirrors

    As you begin to back up, rely on your mirrors to gauge the trailer’s position relative to your surroundings. Keep your eyes on the trailer and adjust your steering as needed based on its angle. Remember, when you turn the steering wheel left, the trailer will move right, and vice versa.

    Step 5: Turn the Wheel Appropriately

    To initiate the backing maneuver, turn the steering wheel in the direction you want the trailer to go. For example, to back into a parking space on the right, turn the wheel to the right. Small adjustments are key; make gradual turns for more precision.

    Step 6: Monitor Progress

    Periodically stop to check your progress. If necessary, reposition your vehicle to achieve a better angle. This helps prevent misalignments and provides the opportunity to reassess your surroundings.

    Step 7: Practice Smoothly

    Keep a steady pace while backing up. Avoid sudden movements which can lead to loss of control. Practice makes perfect; try backing up in various locations to build your confidence and skill level.

    Step 8: Final Adjustments

    As you near your intended destination, make any final adjustments to ensure proper alignment. Finish the maneuver by straightening the vehicle and securing the trailer in the desired position.

    Step 9: Safety Check

    Once the backing maneuver is complete, perform a safety check to ensure the trailer is secure and positioned correctly. Always double-check your mirror and surroundings before exiting the vehicle.

    By following these steps methodically, you will enhance your trailer backing technique, leading to greater success in maneuvering your trailer confidently and safely.

    Common Mistakes and How to Avoid Them During Trailer Parking

    Common Mistakes and How to Avoid Them During Trailer Parking

    When it comes to parking a trailer, several common mistakes can lead to frustration and even accidents. Recognizing these pitfalls is the first step to mastering the art of trailer backing. One major mistake is not using mirrors effectively. Many drivers rely on their rearview mirrors alone, which can create blind spots. Instead, familiarize yourself with your trailer’s dimensions and utilize side mirrors to gain a comprehensive view of your surroundings.

    Another frequent error is oversteering while attempting to back up. Many drivers turn the steering wheel too sharply, which can result in losing control of the trailer. To avoid this, make gentle, gradual adjustments to your steering. Allow the trailer to guide you rather than trying to force it into position.

    Underestimating the importance of planning and preparation is also common. Failing to assess the parking area beforehand can lead to unexpected challenges. Before backing up, take the time to evaluate your surroundings, check for obstacles, and determine the best path for parking. This foresight will make the process smoother and safer.

    Inadequate communication with assisting personnel can exacerbate the challenges of trailer parking. If you have someone outside the vehicle helping guide you, establish clear signals to avoid confusion. Make sure both parties understand the agreed-upon signals before starting the maneuver to ensure a coordinated effort.

    Finally, neglecting to practice is one of the most significant mistakes. Trailer backing requires skill, and the only way to improve is through practice. Spend time in open spaces to build confidence and develop a feel for how your vehicle and trailer respond while maneuvering. The more you practice, the more adept you will become at avoiding these common pitfalls.

  • How to Diagnose Engine Light Codes

    How to Diagnose Engine Light Codes

    How to Diagnose Engine Light Codes

    Understanding the nuances of engine light codes is crucial for every vehicle owner. When the check engine light illuminates on your dashboard, it serves as a warning sign that your vehicle’s onboard diagnostic system has identified an issue that requires attention. As a car owner, knowing how to effectively diagnose these engine light codes can save you time, money, and prevent further damage to your vehicle.

    This guide aims to simplify the process of diagnosing engine light codes, empowering you with the knowledge needed to tackle common vehicle problems. With the right tools and understanding, you can interpret error codes and make informed decisions about repairs or maintenance. Whether you are a seasoned mechanic or a first-time car owner, these insights will enhance your ability to manage vehicle health proactively.

    We will explore various diagnostic tools, explain how to read engine light codes, and provide practical tips for troubleshooting common issues. By following this guide, you will be equipped to address engine problems efficiently, ensuring your vehicle remains in optimal condition. Let’s embark on this journey to demystify engine light codes and strengthen your automotive knowledge.

    Understanding Common Engine Light Codes and Their Meanings

    Understanding Common Engine Light Codes and Their Meanings

    Engine lights can signal a variety of issues in your vehicle, often represented by codes that can be read using an On-Board Diagnostics (OBD-II) scanner. Understanding these codes is essential for diagnosing problems accurately and efficiently. Below are some of the most common engine light codes and their meanings:

    P0300 – Random/Multiple Cylinder Misfire Detected

    This code indicates that the engine control module (ECM) has detected irregularities in the combustion process across multiple cylinders. Causes may include faulty spark plugs, ignition coils, or fuel delivery issues.

    P0420 – Catalytic Converter System Efficiency Below Threshold (Bank 1)

    This code suggests that the catalytic converter is not functioning efficiently, which can be due to a faulty converter, oxygen sensors, or exhaust leaks. A failing catalytic converter may lead to increased emissions.

    P0128 – Coolant Temperature Below Thermostat Regulating Temperature

    This indicates that the engine coolant is not reaching the optimal operating temperature. Potential causes include a malfunctioning thermostat, a faulty coolant temperature sensor, or low coolant levels.

    P0171 – System Too Lean (Bank 1)

    This code appears when the air-fuel mixture is too lean, meaning there is too much air and not enough fuel in the combustion chamber. Common causes include vacuum leaks, clogged fuel injectors, or a failing fuel pump.

    P0455 – Evaporative Emission Control System Leak Detected (Large Leak)

    This code indicates a significant leak in the evaporative emission control system, which is designed to prevent fuel vapors from escaping into the atmosphere. Possible causes include a loose or damaged gas cap, cracked hoses, or a faulty evaporative canister.

    P0440 – Evaporative Emission Control System Malfunction

    This code signifies a general malfunction within the evaporative emission control system. It may require further diagnostics to identify the specific component at fault, such as sensors or valves within the system.

    P0301 to P0306 – Cylinder Misfire Detected

    These codes specify a misfire in a particular cylinder (e.g., P0301 for cylinder 1). Misfires can result from worn spark plugs, faulty ignition coils, or issues in the fuel system.

    Recognizing and understanding these codes can help you take timely action to address engine problems. Ignoring them may lead to more serious issues and costly repairs down the line. Consult a professional mechanic if you’re unsure how to proceed after getting a code readout.

    Step-by-Step Process for Using an OBD-II Scanner

    Step-by-Step Process for Using an OBD-II Scanner

    Using an OBD-II scanner is a straightforward process that can help you diagnose engine light codes efficiently. Follow these steps to ensure a successful diagnostic experience.

    First, locate the OBD-II port in your vehicle. This port is typically found beneath the dashboard, near the steering column. It may be necessary to remove a cover to access the port.

    Once you have located the OBD-II port, turn off your vehicle’s ignition. Connect the OBD-II scanner to the port by plugging it in securely. Make sure the connection is tight and that the scanner is properly seated in the port.

    Next, turn on the vehicle’s ignition without starting the engine. This will power up the scanner. Some scanners may require you to press a power button to activate them.

    After the scanner is on, navigate through the menu using the scanner’s interface. Select the option for “Read Codes” or “Diagnostic Trouble Codes (DTC).” The scanner will communicate with your vehicle’s onboard computer and retrieve any trouble codes stored.

    Review the codes displayed on the scanner. Each code consists of a letter followed by a series of numbers. Refer to the scanner’s manual or an online resource to interpret these codes accurately. Understanding the meaning of each code will help you identify potential issues with your vehicle.

    If necessary, use the “Freeze Frame” option to view additional data related to the trouble codes. This information can provide insight into the engine’s performance at the time the code was triggered.

    After diagnosing the trouble codes, you can choose to clear them if you’ve resolved the underlying issue. Select the “Clear Codes” option on your scanner. Confirm your choice to erase the codes from the system. Remember that clearing codes does not fix problems, and you should ensure any necessary repairs are made before clearing.

    Finally, disconnect the OBD-II scanner from the port and ensure any covers are replaced. It is advisable to take your vehicle for a short drive to test if the check engine light reappears. If the light returns, further investigation or professional assistance may be needed.

    Tips for Interpreting Diagnostic Trouble Codes Accurately

    When dealing with Diagnostic Trouble Codes (DTCs), accurate interpretation is crucial for effective vehicle repair. Here are some tips to guide you through the process.

    1. Understand the Code Format: Most DTCs follow the OBD-II format, which includes a letter followed by four digits. The letter indicates the system (P for powertrain, B for body, C for chassis, and U for network). Knowing the format helps narrow down potential issues.

    2. Use Proper Reference Material: Always refer to a reliable repair manual or an online database specific to your vehicle make and model. This ensures you are interpreting codes in the correct context, as the same code can signify different problems in different vehicles.

    3. Look for Related Codes: Sometimes, multiple codes can illuminate the same issue. When diagnosing, consider all related codes and their possible connections. This will help in understanding if the problems are interlinked or separate.

    4. Consider the Symptoms: Pay attention to the symptoms experienced by the vehicle. These can provide valuable clues in understanding the context of the DTC and assist in confirming a diagnosis.

    5. Clear and Retest: After repairing or inspecting components, clear the codes and retest. This can validate your diagnosis. If the code reappears, further investigation may be necessary.

    6. Use a High-Quality Scanner: Invest in a reliable OBD-II scanner that can provide real-time data, freeze-frame information, and manufacturer-specific codes. This advanced insight enables better problem-solving.

    7. Avoid Jumping to Conclusions: Resist the urge to replace parts based solely on a trouble code. Issues may arise from other systems or even be due to faulty sensors. A thorough inspection should always precede any replacement.

    8. Consult with Experienced Technicians: If uncertain, seek advice from experienced mechanics or automotive technicians. Their expertise can help clarify complex codes or symptoms that may not be immediately obvious.

    By following these tips, you can enhance your ability to interpret Diagnostic Trouble Codes accurately, leading to more effective vehicle diagnostics and repairs.

  • Best Brake Kits for Performance Vehicles

    Best Brake Kits for Performance Vehicles

    Best Brake Kits for Performance Vehicles

    When it comes to optimizing vehicle performance, upgrading your braking system is often overlooked. High-quality brake kits not only increase the safety of your vehicle but also significantly enhance its responsiveness and driving experience. Whether you are a casual driver or an automotive enthusiast, having the right brake components can make a noticeable difference in how your car handles various driving conditions.

    In this article, we will explore the top brake kits currently available on the market, focusing on their features, benefits, and suitability for different types of vehicles. From high-performance sports cars to more practical daily drivers, each kit is designed to meet specific needs while ensuring durability and reliability. Investing in a top-notch brake kit can lead to improved stopping power, reduced brake fade, and longer-lasting components, ultimately enhancing your vehicle’s overall performance.

    Join us as we dive into the essential factors to consider when selecting a brake kit and highlight the leading options that deliver exceptional results. Whether you’re looking to upgrade your brakes for racing, off-roading, or everyday use, this guide will help you make an informed decision and elevate your driving experience.

    Choosing the Right Brake Kit for Your Vehicle Type

    Choosing the Right Brake Kit for Your Vehicle Type

    Selecting the appropriate brake kit is crucial for maximizing your vehicle’s performance and ensuring safety. Different vehicle types have distinct requirements, and understanding these can help guide your choice.

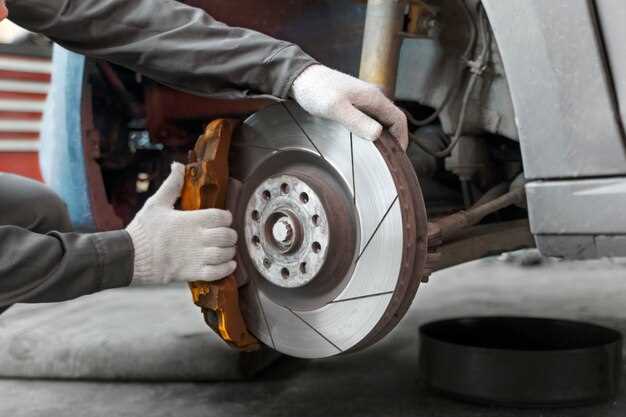
    Passenger Cars: For everyday driving, a performance-oriented brake kit with quality rotors and semi-metallic pads is recommended. This combination offers a balance of stopping power and noise reduction. Look for kits that feature slotted or drilled rotors to improve heat dissipation and reduce brake fade.

    Sport and Performance Cars: Vehicles designed for high speed and agility require high-performance brake kits. Consider options with multi-piston calipers and carbon-ceramic rotors for optimal stopping power and reduced weight. Upgraded pads with high friction coefficients can also enhance braking response and thermal stability.

    SUVs and Trucks: Heavier vehicles demand brake kits that can handle increased stress. A heavy-duty brake kit with larger rotors and robust calipers is necessary to provide reliable stopping capabilities. Look for kits that utilize premium ceramic pads to minimize dust and extend rotor life, as well as those rated for specific towing capacities if applicable.

    Off-Road Vehicles: For off-road applications, durability and resistance to harsh conditions are key. Invest in a brake kit designed with reinforced rotors and pads optimized for gravel and mud driving. Kits should also feature protective coatings to prevent rust and corrosion in extreme environments.

    Lastly, always ensure compatibility with your vehicle’s make and model. Checking manufacturer specifications and consulting with professionals can help you avoid potential installation issues and achieve the best performance from your selected brake kit.

    Installation Guide: Tips for a Successful Brake Kit Upgrade

    Upgrading your vehicle’s brake kit is a significant improvement that enhances performance, safety, and overall driving experience. To ensure a smooth upgrade process, follow these essential tips.

    1. Gather Necessary Tools and Materials

    Before starting the installation, make sure you have all the required tools. Essentials typically include a jack, jack stands, lug wrench, brake fluid, and specific tools for removing calipers and rotors. Check the manufacturer’s instructions for any special tools you might need.

    2. Review the Manual

    Consult your vehicle’s manual for specific brake system guidelines. Understanding your car’s brake assembly will help identify any unique components or procedures required for your model.

    3. Ensure Safety First

    Always prioritize safety. Park your vehicle on a flat surface, engage the parking brake, and use wheel chocks. Wear protective gear, including gloves and goggles, to protect yourself from debris and brake fluid.

    4. Remove Old Brake Components

    Start by loosening the wheel lug nuts before lifting the vehicle. Once elevated, remove the wheels to access the brake components. Carefully detach the calipers and old rotors, making sure to keep track of any small parts or hardware that may need to be reused.

    5. Prepare New Components

    Before installation, inspect new components for any defects. Clean the rotors thoroughly to eliminate any protective oil coating. If your kit includes new brake pads, prepare them by applying brake grease to the back to reduce noise and ensure smooth operation.

    6. Install New Brake Kit

    Begin installing the new rotors, ensuring they are seated correctly. Attach the calipers and secure them according to the manufacturer’s specifications. Double-check that all bolts and fittings are properly tightened to avoid any issues after installation.

    7. Bleed the Brakes

    After installation, it’s essential to bleed the brake system to remove any air trapped in the lines. Follow a recommended bleeding procedure using either the two-person method or a brake bleeder tool. This step ensures optimal brake responsiveness.

    8. Test Drive Carefully

    Once everything is assembled, take your vehicle for a cautious test drive. Gently test the brakes in a safe area first to assess any unusual noises or behaviors. Gradually increase your speed and test different braking pressures to gauge performance.

    9. Monitor Performance

    After the installation, keep an eye on the brake performance over the next few weeks. Look out for any signs of irregular wear, noise, or vibrations. Early detection of potential issues can prevent larger problems down the line.

    By following these guidelines, you can achieve a successful brake kit upgrade, enhancing both your vehicle’s performance and your peace of mind on the road.

    Understanding Brake Components: What to Look for in Quality Kits

    Understanding Brake Components: What to Look for in Quality Kits

    When selecting a brake kit, understanding the individual components is crucial for enhancing vehicle performance and safety. Quality kits typically include brake pads, rotors, calipers, and hardware. Each component plays a vital role in the braking system’s overall functionality.

    Brake pads are essential for friction generation when stopping. Look for pads made of high-quality materials such as ceramic or semi-metallic compounds, as they offer a balance between performance and noise reduction. Pay attention to the heat resistance and the coefficient of friction, as these factors affect braking efficiency under various conditions.

    Rotors, or brake discs, are another critical component. Opt for slotted or drilled rotors as they enhance ventilation and improve heat dissipation. A good rotor should maintain its shape under extreme conditions and resist warping. Inspect the rotor’s thickness and surface finish, as these attributes contribute to effective braking and longevity.

    Calipers are responsible for applying pressure to the brake pads against the rotors. High-performance calipers typically feature a lighter construction but offer greater strength and better heat dissipation. When evaluating calipers, consider the number of pistons; more pistons can result in improved clamping force and better modulation.

    Lastly, ensure that any hardware included in the kit is of high quality. This includes brackets, bolts, and shims. Proper hardware will ensure the components fit together securely and help maintain consistent performance over time.

    When assessing brake kits, also consider brand reputation, warranty, and user reviews. A reputable manufacturer that offers a warranty usually stands behind the quality of their products. Investing in a well-rounded brake kit will significantly enhance your vehicle’s performance and safety.